


Redux is great, but working on it for a large scale app can be very tedious and sometimes complex because of the boilerplate code that it has. It also affects the readability of the project and eventually makes it very hard to maintain and make changes to the store.
When I was working on one of my react projects, Initially, I was using the default redux for its state management. As and when time passed by the complexity of the project grew up along with the store. At one point the store started growing so much that it got very hard for me to maintain it. I was also using redux-saga middleware for handling all the side effects, making API calls, etc.. and it also added up to the code’s complexity.
This got me thinking about using some kind of a different way of writing the store that can help reduce the boilerplate code or make the code somewhat readable and simple to understand so that it becomes easier to make changes and maintain the store. I found out about the Redux Ducks pattern and started using it. It is a very modular way of writing reducers and it also eliminates a lot of boilerplate code. I also used the reduxsauce package, which actually gave me the inspiration to build my own wrapper called rega (REdux + saGA) that can be more readable, easier to make changes to, and can provide a quick way to hook sagas onto an action.
Let's create a simple update counter app and make use of rega to setup redux and saga in our app.
In this example, we need to create a counter and two buttons that will update the count on clicking them. One button will increment the count while the other will decrement it. How much the count will increase or decrease will be based on a random number which we will generate using a random number generator API.
Before writing any code, this is what the folder structure will look like when using rega. Notice how the counter folder only contains two files, while in a traditional redux app it would have contained nearly five files (reducer.js, actionTypes.js, actions.js, sagas.js, and selectors.js).
/src
├── App.js
├── index.js
├── style.css
└── redux
├── counter
│	  ├── index.js  // this will be our reducer file.
│	  └── sagas.js  // this will be our saga file.
└── store.js      // this will be the file
Let's first start by creating our counter reducer:
src/redux/counter/index.js
import { rega } from "@dhruwlalan/rega"

import { updateCounter } from "./sagas"

export const {
  CounterReducer,
  CounterSagas,
  CounterActions,
  CounterSelectors,
} = rega({
  name: "counter",
  initialState: {
    count: 0,
    isUpdating: false,
    isUpdatingDone: false,
    isUpdatingError: false,
    updatingError: null,
  },
  actions: {
    updateCounter: {
      saga: updateCounter,
      arguments: ["currentCount", "actionType"],
      reducer: () => ({
        isUpdating: true,
        isUpdatingDone: false,
        isUpdatingError: false,
        updatingError: null,
      }),
    },
    updateCounterDone: {
      arguments: ["count"],
      reducer: ({ count }) => ({
        count,
        isUpdating: false,
        isUpdatingDone: true,
        isUpdatingError: false,
        updatingError: null,
      }),
    },
    updateCounterError: {
      arguments: ["error"],
      reducer: ({ error }) => ({
        isFetching: false,
        isFetchingDone: true,
        isFetchingError: true,
        updatingError: error,
      }),
    },
  },
})
The rega() function exports four things:
CounterReducerwhich we need to pass to the root reducer.CounterSagaswhich we need to pass to the root saga.CounterActionswhich our app can use to dispatch actions.CounterSelectorswhich our app can use to access the counter state variables.
The rega() function takes an object which contains these three keys:
namerega will use this value and will prefix it with the return value that it will export. For example, ifname: 'foo'then the function will export:FooReducer,FooSagas,FooActions,FooSelectors.initialStateis the initial state of the reducer.actionsthis is the list of all the actions that we can dispatch (rega automatically creates the actions object with the proper type and payload when dispatching them). It contains three things:argumentswhen dispatching the actions, if we want to pass any extra keys to the action object, we can name them here.[]represents that we don't want to pass any extra payload.sagathis is optional & is very useful to hook any saga with the action. So whenever the action is dispatched, the corresponding saga is automatically called without your need to manually create a listener for it.reducerthis is the simple reducer function that returns the next state. We can also make use of any payload here that we have mentioned in theargumentsfield.
Second, let's create our updateCounter saga in the sagas.js file
src/redux/counter/sagas.js
import { put } from "redux-saga/effects"

import { CounterActions } from "./index"

export function* updateCounter({ currentCount, actionType }) {
  try {
    const response = yield fetch(
      "https://www.randomnumberapi.com/api/v1.0/random?min=1&max=10"
    )
    const data = yield response.text()

    let count = currentCount

    if (actionType === "INCREMENT") {
      const newCount = currentCount + Number(data[1])
      count = newCount > 100 ? 100 : newCount
    } else if (actionType === "DECREMENT") {
      const newCount = currentCount - Number(data[1])
      count = newCount < 0 ? 0 : newCount
    } else {
      count = currentCount
    }

    yield put(CounterActions.updateCounterDone({ count }))
  } catch (error) {
    yield put(CounterActions.updateCounterError({ error }))
  }
}
Here, updateCounter is just a simple saga function that we are exporting and hooking into the updateCounter action inside the actions object. Therefore, whenever we dispatch the updateCounter action, this saga will get called automatically.
Finally lets connect our reducer & saga with the store.js
src/redux/store.js
import { createStore, combineReducers, applyMiddleware } from "redux"
import createSagaMiddleware from "redux-saga"
import { all } from "redux-saga/effects"

import { CounterReducer, CounterSagas } from "./counter"

const sagaMiddleware = createSagaMiddleware()

const rootReducer = combineReducers({
  counter: CounterReducer,
})

const rootSaga = function* () {
  yield all([...CounterSagas])
}

export const store = createStore(rootReducer, applyMiddleware(sagaMiddleware))

sagaMiddleware.run(rootSaga)
Simply pass the CounterReducer & CounterSagas to the rootReducer & rootSaga and you are done with the setup.
Let’s now take a look at how we can use the reducers state variables & dispatch actions.
src/app.jsx
import React from "react"
import { useDispatch, useSelector } from "react-redux"
import "./style.css"
import { CounterActions, CounterSelectors } from "./redux/counter"
export default function App() {
const dispatch = useDispatch()
const count = useSelector(CounterSelectors.count)
const isUpdatingCount = useSelector(CounterSelectors.isUpdating)
return (
<div>
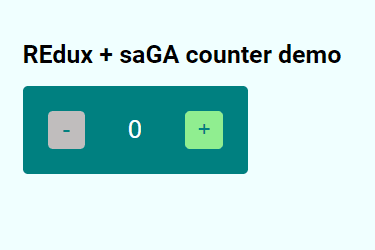
<h1>REdux + saGA counter demo</h1>
<div className="counter">
<button
disabled={isUpdatingCount || count === 0}
className="decrement"
onClick={() =>
dispatch(
CounterActions.updateCounter({
currentCount: count,
actionType: "DECREMENT",
})
)
}
>
-
</button>
<span className="count">{count}</span>
<button
disabled={isUpdatingCount || count === 100}
className="increment"
onClick={() =>
dispatch(
CounterActions.updateCounter({
currentCount: count,
actionType: "INCREMENT",
})
)
}
>
+
</button>
</div>
</div>
)
}- To use the reducers state variables, we can use the
useSelectorhook & pass in ourCounterSelector& access all its state variables using the dot.operator as shown in the example above. It's worth noting that we can only use this dot operator to select keys defined in the object'sinitialState, which is passed to the countersrega()function. - To dispatch actions, we can make use of the
useDispatchreact hook & dispatch counter actions usingCounterActionsvariable exported from therega()function and call any counter action using the dot.operator. Note that only the actions defined under theactionsobject which is passed to the countersrega()function are only dispatchable.
This is just how much code is required to create a simple reducer along with its saga.
If you want to take a look at the comparison of this same counter example using traditional redux, you can check out the code here along with the rega version of it over here.
Thank you!


